
I am very new to the sewing blog world, and I was always wondering how you get to meet the other sewing blog ladies. When Rikka from Ricochet and Away! announced her sewing challenge, I thought, hey here is a great opportunity!
As I mentioned here the theme of the challenge is pleats, pin-tucking, and smocking. Since my real passion is sewing clothes, and I need to work on Littleheart's winter wardrobe, I chose to make Littleheart an outfit for the challenge. My personal challenge was to try to incorporate all three techniques (pleats, pin-tucking, and smocking) into one outfit and I did!
See where they all are?

And here some more detailed views:


I am very happy with the outcome. Unfortunately I don't have any pictures of Littleheart wearing it yet, because it is still 30 degrees Celcius here, and I didn't want to force it onto her just for photos. But I promise to post pictures when the weather gets cooler....
Anyway, if you need a girl's long sleeve outfit, approximately size 3T (maybe even 4T) you are in luck and can download the pattern here. (Make sure when you print your page scaling is set to "none". Otherwise your printer will shrink the pattern. Hey if you need size 2T maybe do just that). Half an inch seam allowance is already included! If you need a different size, don't worry. you can use a bodice/sleeve you have that fits, and make the bottom part yourself.
And here is how you make it:
What you need:
2 contrasting pieces of knit fabric. If you are making a winter outfit, I would use a thick knit fabric. If you want the outfit to be similar to mine, use a plain and a striped knit. You need about a yard of each, to be on the safe side (probably less).
Making your pattern:
If you are not using my pattern (size 3-4T) then you can draft your own or use an existing pattern and change it a bit (the following pictures are just sketches)
Take a t-shirt that fits and trace the front and the back. Cut them off about three inches under the armpit. Measure across the bodice

On a new piece of paper, draw a line 1.5 inches less than what you measured across. Then add 1/2 " for seam allowance.
Draw the following shape (the left side should be diagonal, the right side straight down):

The length should be as long as you want, depending if you are making a dress or a tunic. Now add about three inches to the top of the skirt piece (for the pin-tucks)
Now make a rectangular piece, the same length as your skirt piece (without the three extra inches for pin-tucks), and 5 " wide.
Make your sleeve piece. Here is a good tutorial how.
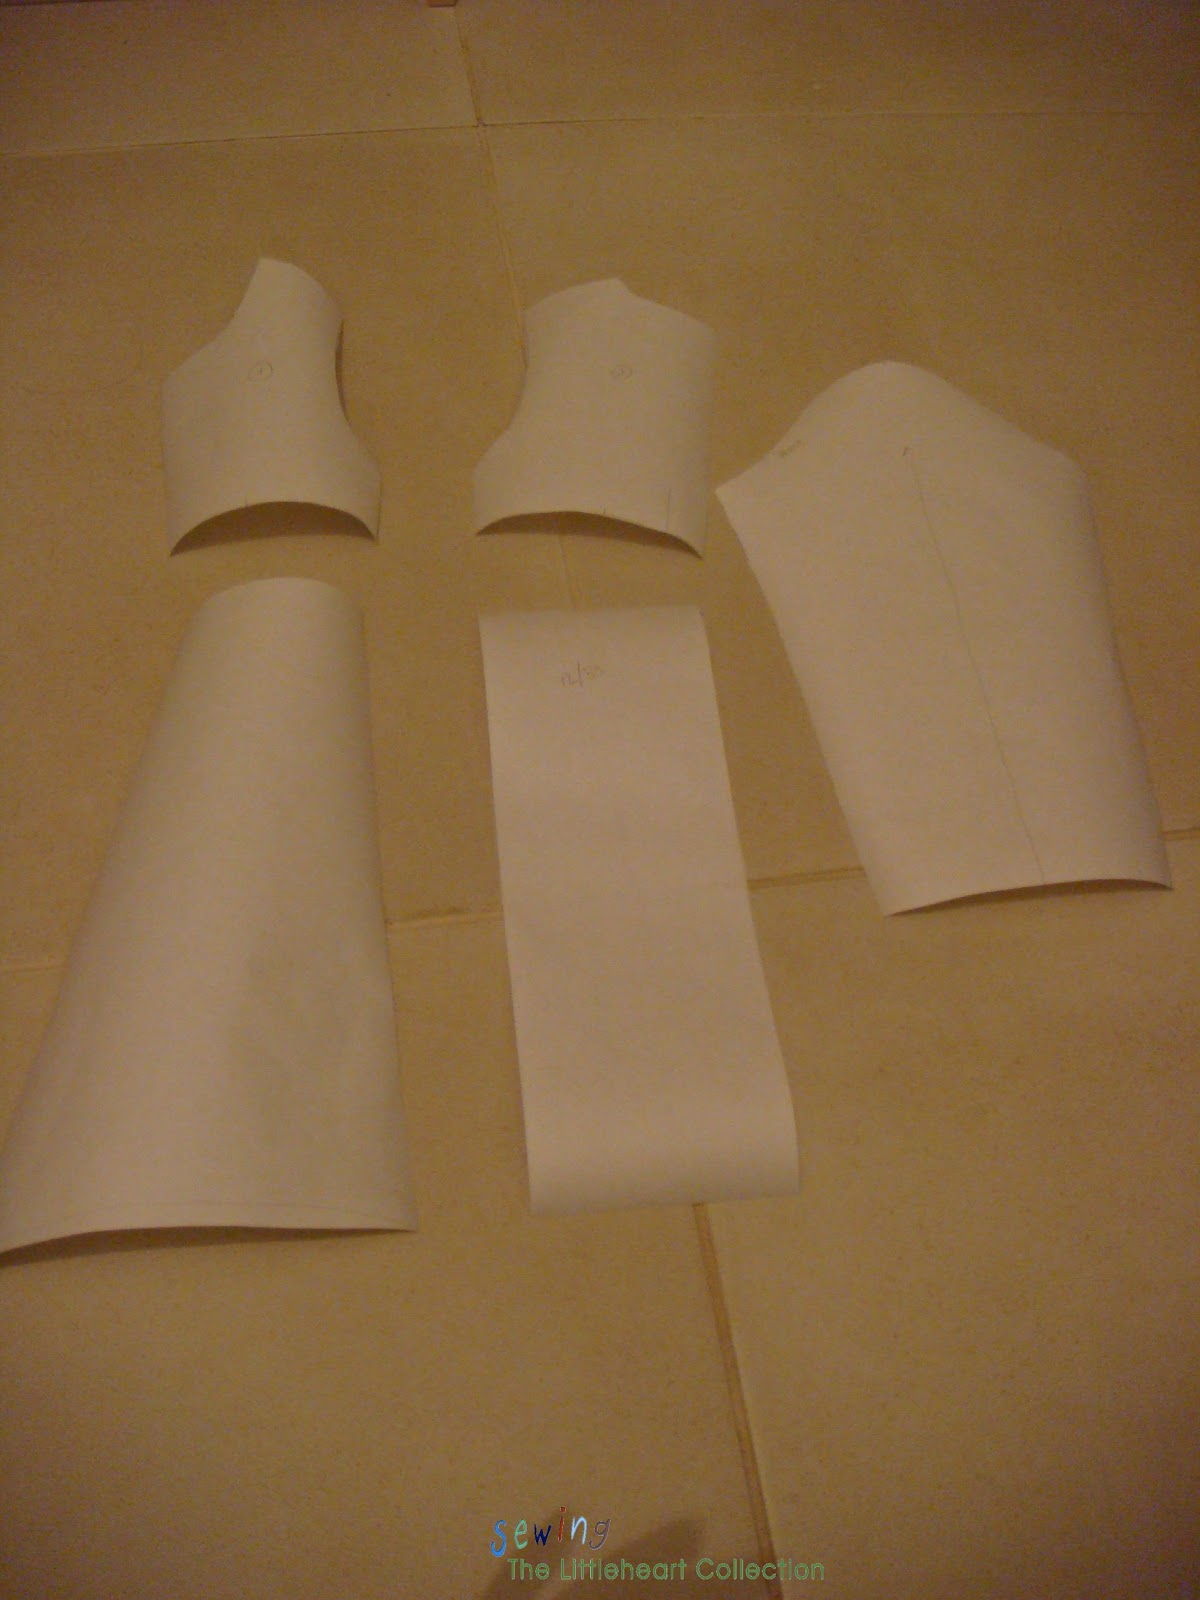
You should now have the following pieces:
- Front and Back Bodice
- Skirt
- Middle Strip
- Sleeve
Cutting:
Stripes:
- Cut a front bodice and a back bodice on the fold.
- Cut your rectangular strip (I cut it with the stripes going the other direction).
- Cut your sleeves.
- Cut you neckband (for my pattern 14" by 2", if you are making your own pattern measure around the front and back neck and subtract about an inch)
Plain:
- Cut two skirt pieces, fold your fabric in half so that you have a right piece and a left piece.
- Cut another skirt piece (the back), this time on the fold, but lay your pattern piece 1.5 inches away from your fold (see picture)

- Cut two strips for your wrist bands (if you are using my pattern cut them 6.3" by 2", if not measure the wrist on the sleeve pattern piece, multiply by 2 and subtract half an inch for the length. Width you can do 2")
You should now have the following pieces (plus your sleeves, wrist bands and neck band):

Sewing (all seams should be sewn with 1/2 an inch seam allowance unless otherwise noted):
I used my serger for this project, but you can just as well use a normal sewing machine. Just be sure to use a ballpoint needle.
First we are going to make the pin-tucks. Here is a good tutorial at Burda on how to make pin-tucks, of you are not familiar with the technique. Take your two single skirt pieces and make 6 pin-tucks across the top of the pieces. Start about an inch down from the top, so you have enough material to sew the skirt to the bodice.

Your skirt pieces should now be as long as your rectangular piece. If not you can straighten them out later.
Pin
your middle strip to one side of the pin-tucked skirt. Make sure all your
pin-tucks are pinned downward. Sew along the side, starting at the top (where
the pin-tucks are). Do the same with the other side.

Your piece should now look like this:

Now
make your pleat. Mark the middle of your skirt piece with a pin. From there, mark 1.25" to each side. Take your mark and fold it over to the edge of the middle piece, creating a pleat. Pin it down. Do the same for the other side. You should now have two pleats, one on the right edge of the middle piece and one on the left.
Starting at the top, sew
down each fold, just to the last pintuck. Backstitch to secure.
(I am sorry my pictures turned out so dark).

Iron down the pleat, all the way to the bottom.
The width at the top of your skirt piece should now be about the width of your front bodice.
Now pin the bottom of your front bodice, to the top of your skirt piece, right sides together and sew across. Then topstitch along the seam.

Sew the back bodice to the back skirt piece in the same manner. Topstitch that too.

Sew your shoulder seams.
Now sew in your neck band (using 1/4 " seam allowance). With right sides together, sew the neckband together forming a loop. Fold the loop in half (wrong sides together) and press. Pin your neckband (raw sides together) to four places of your neck, on the shoulder seams and on the front and back. Start stitching your neckband to your shirt, using a stretch stitch. As you sew, stretch the band a bit (do not stretch the neck of the shirt). Stretch enough so when you get to your pin the band is lying flat on the shirt. You need to stretch the band so that the shirt will lie smoothly.Top stitch around the neck using a stretch stitch.

Set in your sleeves (before you sew the side seams). Sew on the sleeves. You can use this tutorial if you are not sure how.

Now pin together the sides of the sleeves and the sides of the skirt. If you used stripes make sure you match them up. Starting at the wrist, sew along the sleeves and the sides, using half and inch seam allowance.

Sew on your wrist bands (in the same manner you did the neck band).
Straighten
out your bottom. I wanted this one to be a long tunic so I cut off quite a bit
at the bottom. It could just as well be a dress though.
Hem your shirt. Make sure you do not sew down the pleats on the bottom. Hem with the pleats open.
Your shirt is now done!

Want to make the Smocked Applique?
Continue reading!
What you will need:
Scrap of plain knit fabric
Double sided Heat n' Bond
Embroidery Thread
A shape template of your choice (I used a heart)
Cut a piece of rectangle fabric. Draw your grid on the fabric. Smock the fabric (I used this tutorial for smocking). Smock enough so that your shape is completely covered with smocked fabric.
Iron on your double sided Heat n' Bond to the back of your smocked fabric.
Trace your design (in my case the heart) onto the paper side of the Heat n' Bond .
Cut out your design.
Take the paper off from the back and iron the shape onto your shirt. Zigzag around the edges.
Now your shirt is ready to be worn! Enjoy!

(I will show you how to make the leggings a different time)
Don't forget to stop by in October at Ricochet and Away! and vote for my outfit or for any of the other amazing projects!
I will also be linking up to some of the link parties on this page .

Mira,
ReplyDeleteYou are SO TALENTED!! I love the outfit, the colors, everything. If I could sew like you, I would be doing it all the time!! :D
Thanks Patty! Looking forward to seeing more of your projects!
DeleteWhat a gorgeous outfit, Mira!!! Same as Patty, I love everything about it and the little smocked heart is just adorable!!! As always, a great tutorial.
ReplyDeleteVery Pretty mira:) !!
ReplyDeleteThis is very unique and cute! Thanks for sharing. I especially love your little heart...
ReplyDeleteThis is so cute, thanks for sharing!
ReplyDeletewww.blissfulsewing.blogspot.com
Nice detail with the smocked heart. You are so ambitious! I am hoping to get a pintucked shirt done in time!
ReplyDeletegood work. what a fun challenge! I came over from thecreativeitch and I can't wait to see more of your projects
ReplyDeleteThank you for sharing the pattern and such detailed instructions! I might have to try some of these techniques on a winter outfit for my little girl. Found you on the Sugar & Spice Link-up at 733.
ReplyDeleteBest wishes for you in the challenge!! I came here from the Train into Crazy and am a new blogger also. Cute outfit!
ReplyDeleteThanks Gina, good luck with your new blog!
DeleteGreat outfit! We featured you on our blog post today! You can find it here http://onceuponasewingmachine.com/5-things-we-love-diy-childs-fall-wardrobe/
ReplyDeleteThanks! Great inspiring post!
DeleteAmei ficou lindo. Parabéns
ReplyDeletehttp://becaeyel.blogspot.com.br/
This comment has been removed by the author.
ReplyDeleteHi Mira, I've featured your outfit today. I've got the right address this time...
Deletehttp://threadingmyway.blogspot.com/2012/09/threading-your-way-features_22.html
I love this! So fun. I'll be featuring it Saturday on our What I Wore Sunday post. Thanks so much for linking up! :)
ReplyDelete~Natalie
Hi Mira, I love your entry to the challenge, you have done a spectacular job, I love it. I'm also participating in this challenge, it is a nice experience. Thanks for the tutorial you have done, is well explained and the photos are of a great help. I'm your new follower, I hope you have a little bit of time and come to visit my blog
ReplyDeletehttp://passionetcouture.blogspot.ca/
Have a nice day! Marisa.
Thanks Marisa! I love your pillow you made for the challenge!
DeleteHey....Great Blog
ReplyDeletesimonis dog bandana
I love my hubby T-shirt
Congratulations Miss Mira! You've won the bronze prize in the Fab Folds Challenge. Your outfit is awesome and lots of others thought so as well! Thanks so much for your participation. I hope you'll keep in touch.
ReplyDeleteHugs!
Rikka
awesome outfit! congrats!
ReplyDeletepreciosos, muchísimas gracias por el tutprial ¿te importa si te enlazo en mi blog?
ReplyDeleteSuch an adorable outfit!!! I love it!
ReplyDelete